 当前位置:
当前位置: 大多数电脑支持uefi引导安装系统,uefi gpt模式下系统启动速度更快,支持硬盘容量更大,这是新技术所带来的便利,不过uefi需要装64位win7系统以及更新版本的系统,ghost win7 64位支持uefi安装,那么uefi gpt装ghost win7系统步骤是怎样的呢?其实跟普通的U盘安装方法类似,下面跟系统城小编一起来学习下uefi安装win7 ghost步骤。
安装须知:
windows7 - 1、uefi安装系统需要主板支持UEFI引导,而且系统必须是win7 64位系统
windows8 - 2、如果之前是Legacy启动,uefi装系统需要重新分区,安装前需要格盘,大家务必备份转移硬盘所有数据
相关教程:
uefi装原版win7系统教程
怎么看主板是否支持UEFI模式
win7一 、安装准备
windows7 - 1、支持UEFI启动的电脑,4G容量U盘
windows8 - 2、系统镜像下载:雨林木风ghost win7 64位完整旗舰版V2017
windows10 - 3、uefi启动u盘:uefi pe启动盘制作教程
xp系统 - 4、gpt win7激活工具(非mbr引导的分区永久激活工具) v0.9绿色版
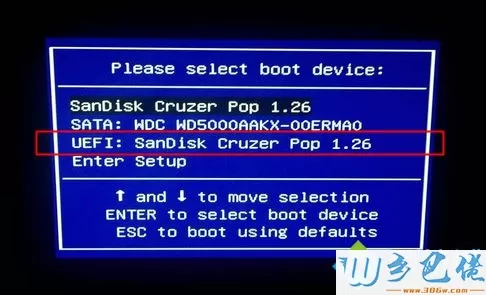
win8二 、启动设置
电脑设置UEFI启动的方法
U盘装系统启动热键大全
如果你的BIOS里有这些选项请设置如下:
Secure Boot 设置为Disabled【禁用启动安全检查,这个最重要】
OS Optimized设置为Others或Disabled【系统类型设置】
CSM(Compatibility Support Module) Support设置为Yes或Enabled
UEFI/Legacy Boot选项选择成Both
UEFI/Legacy Boot Priority选择成UEFI First
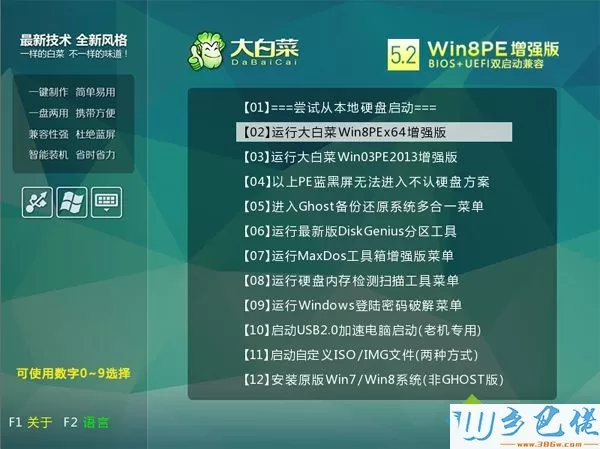
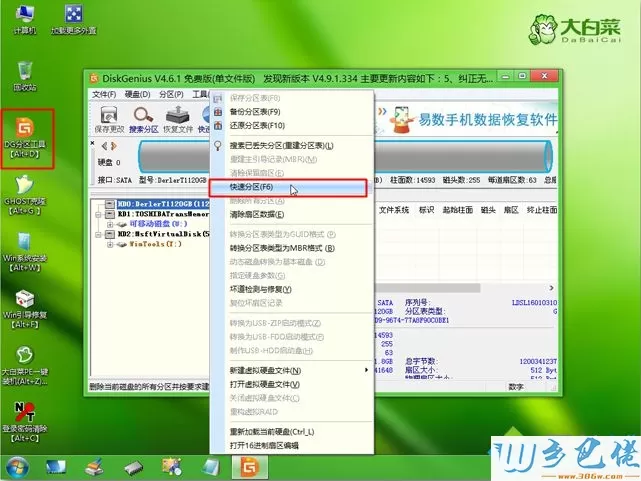
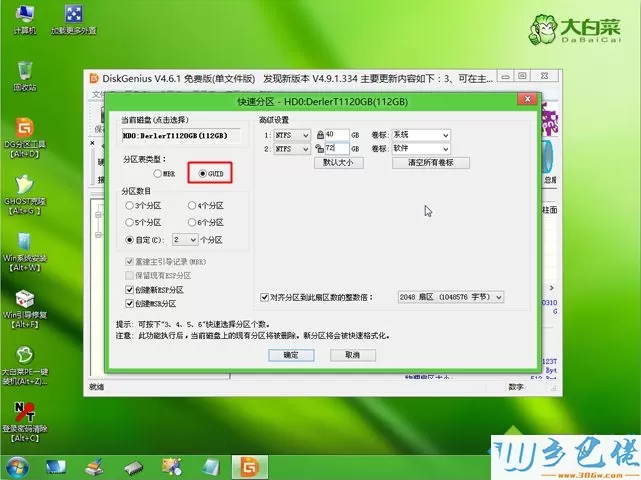
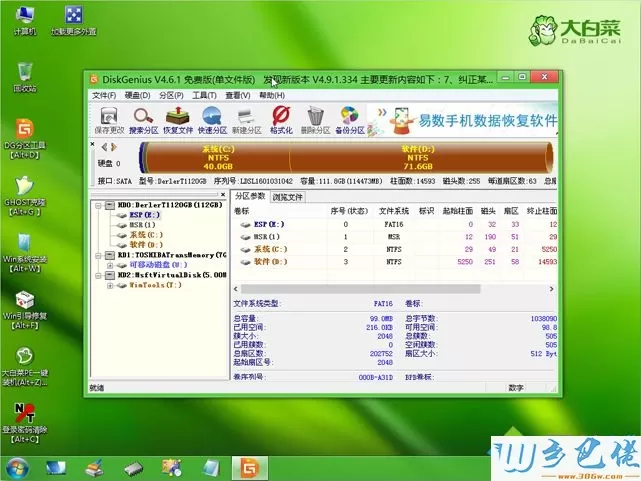
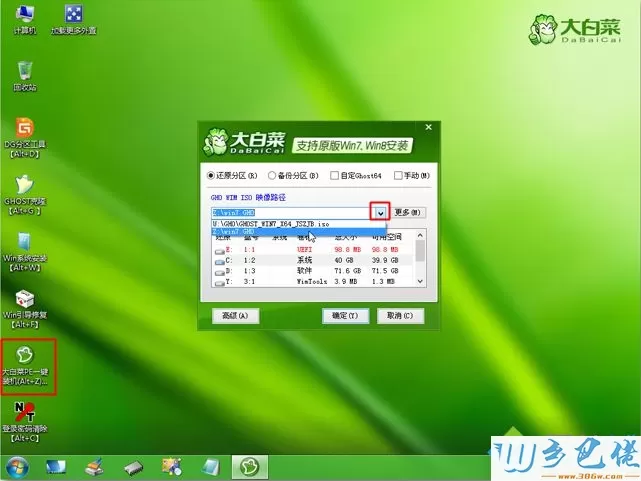
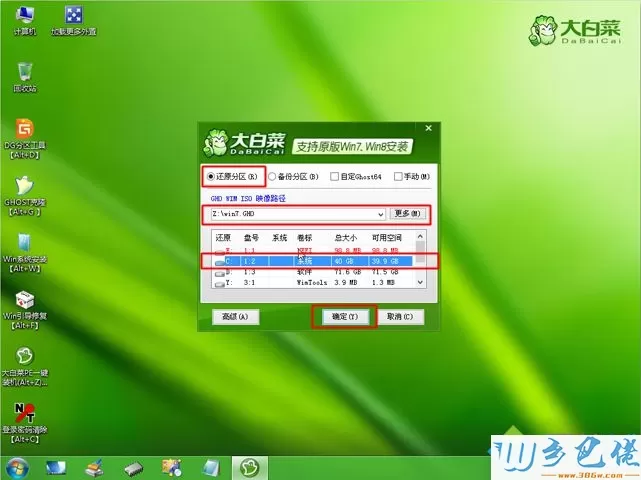
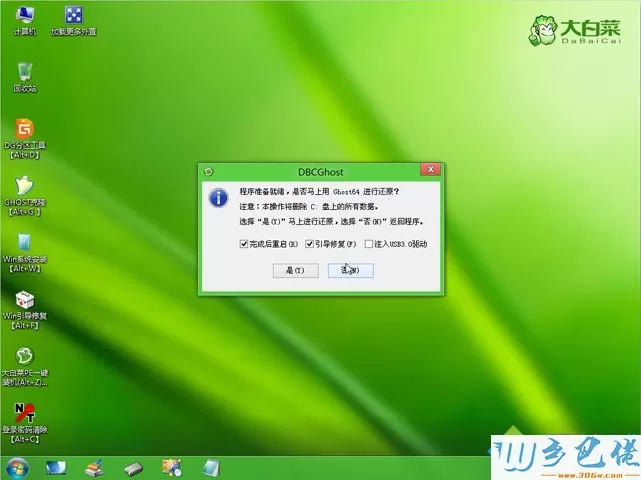
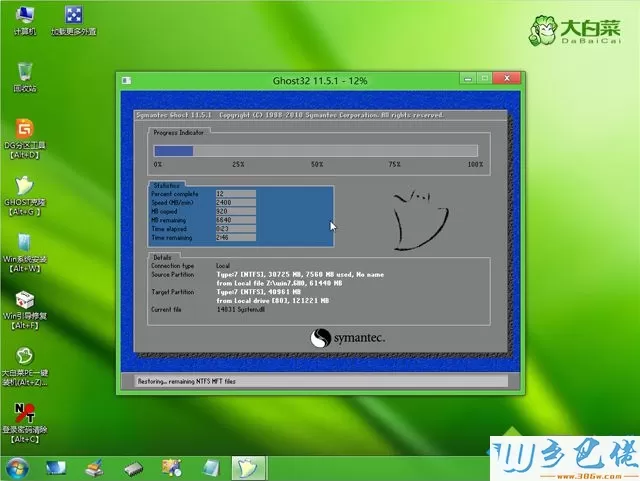
win10三 、uefi gpt安装ghost win7系统步骤如下
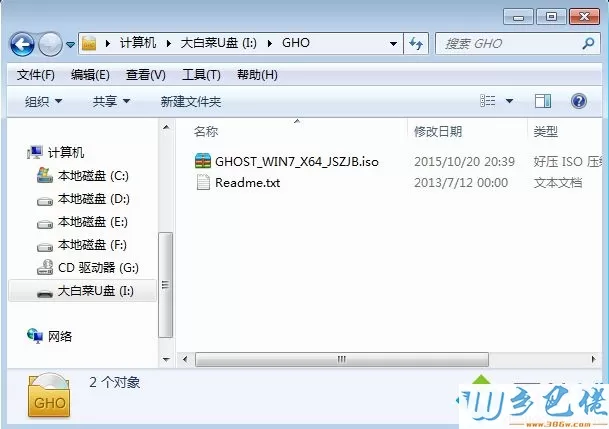
windows7 - 1、制作好uefi pe启动U盘之后,将ghost win7 64位系统iso镜像直接复制到U盘gho目录下;
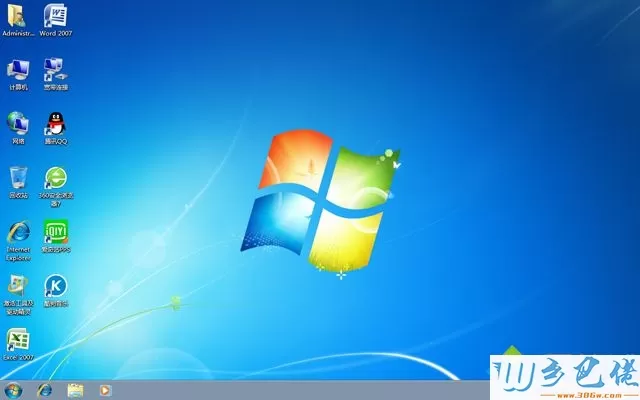
uefi安装win7 ghost步骤就为大家介绍到这边,如果电脑支持uefi引导,就可以按照上面的方法在uefi安装ghost win7系统。